Symmetrical Split Photos with the Lomo LC-A+ and Splitzer by Bruno Ricardo Silva
3 13 Share TweetPortuguese Lomographer Bruno Ricardo Silva aka fastbr is a determined expert in symmetrical split photos, giving both the geometrical and cautious yet raw and natural feel to his photographs. He has several ways on how to take such crafted shots. In this article, he reveals all his tricks to achieve the perfect results.


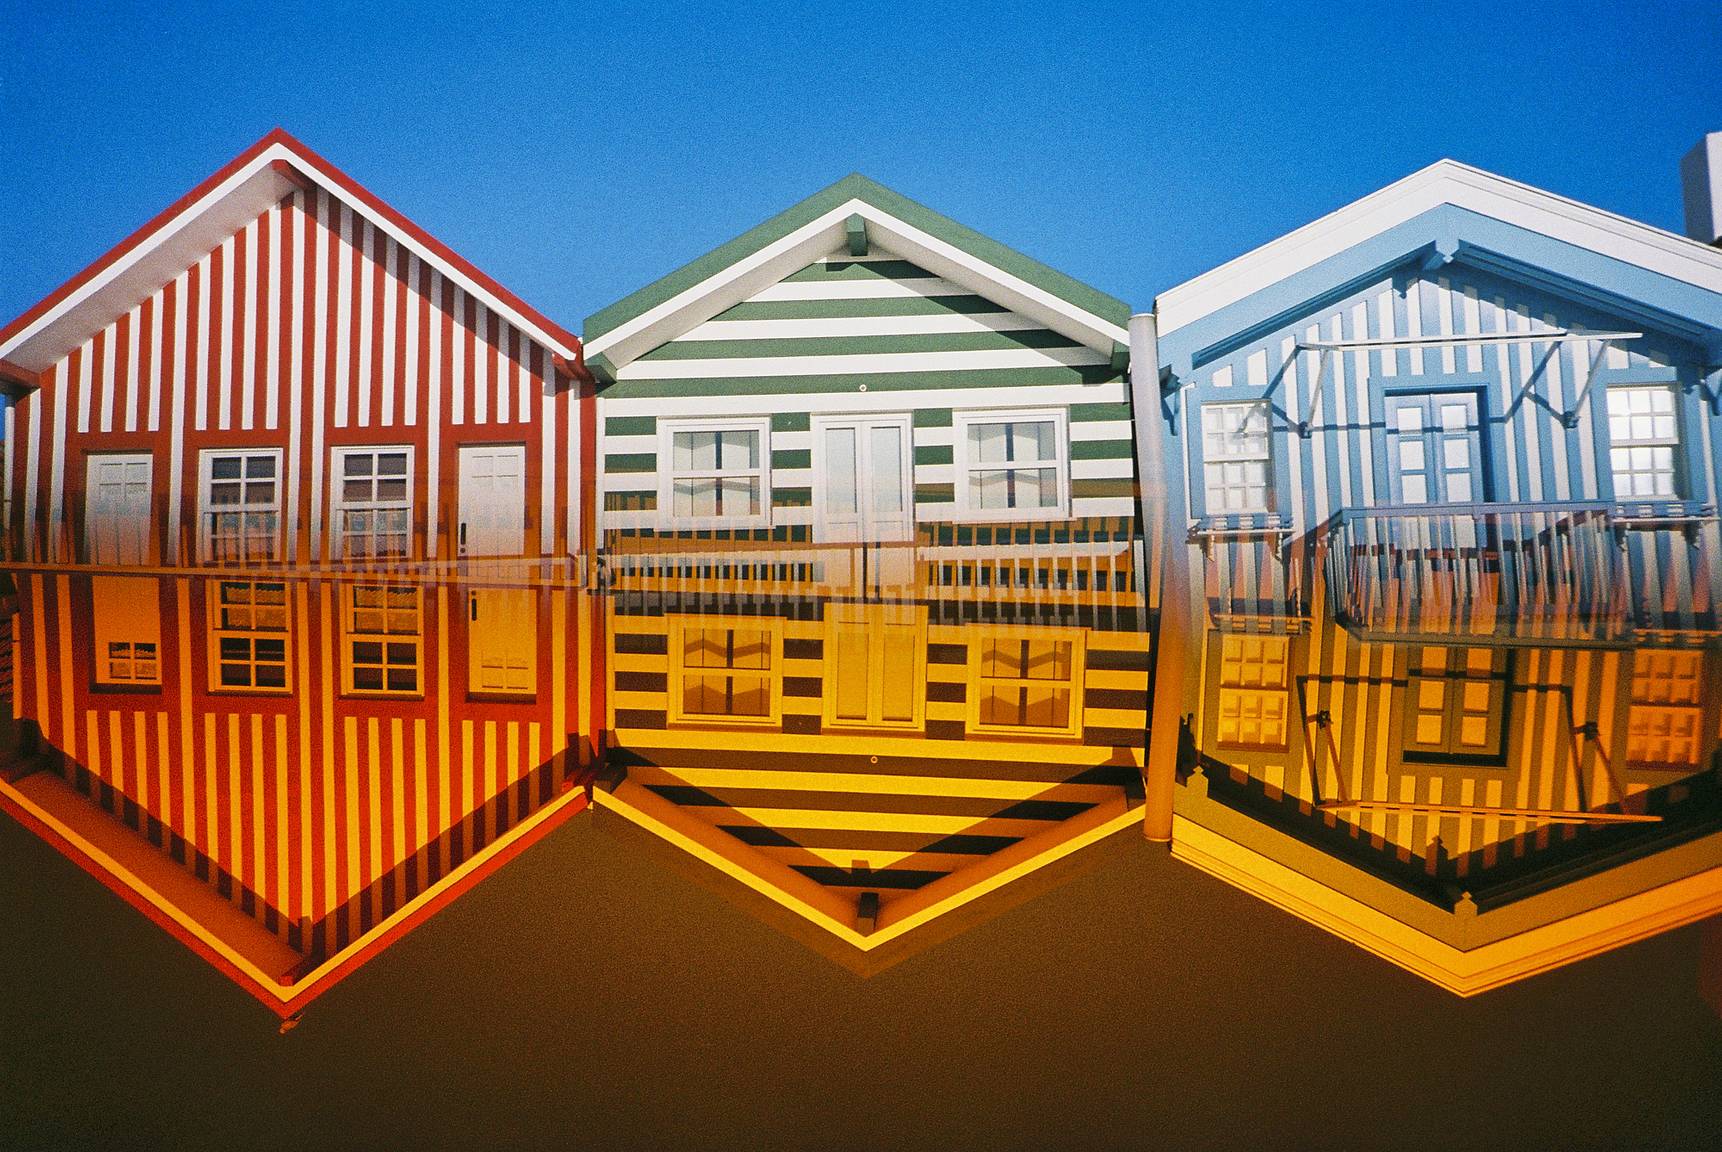
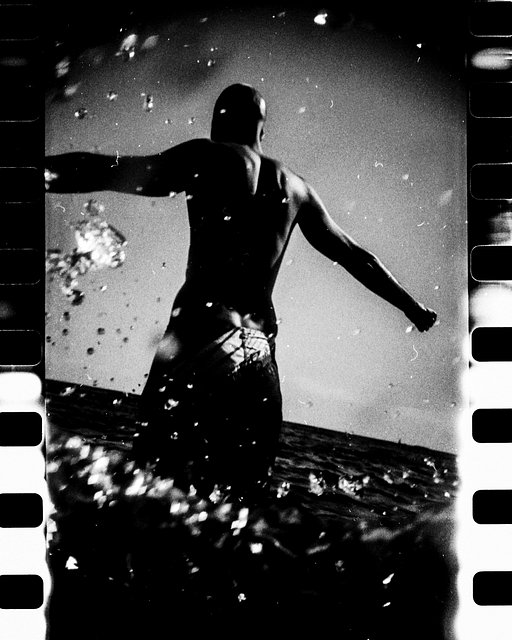
Ah, the split photo technique! The best camera to create this effect is, of course, the Lomo LC-A+ with its Splitzer. A very light camera, easy to use upside down with a nice rack to insert its Splitzer.
The perfect symmetrical photo is hard to achieve and to do that, the best solution is to take the same picture several times. With this method, the probability to achieve success gets higher. In my case, I take the same picture 3 or more times.
One Side Exposed
With this method is almost certain to get a perfectly symmetrical photo. It “corrects” misalignments, different orientations of the camera, and most importantly, badly exposed photos since when the camera is upside down it is easy to miss a good exposition time. Another nice idea is to take the same picture, first from bottom to top and then from top to bottom.
1st Picture: Top Side
- LC-A+ in normal position and Splitzer with the bottom side covered.
- Subject framed from bottom to top
- Shoot
- MX Button
1st Picture: Bottom Side
- LC-A+ upside-down position and Splitzer with the top side covered
- Subject framed from top to bottom
- Shoot
- MX Button
2nd Picture: Bottom Side
- LC-A+ upside-down position and Splitzer with the top side covered
- Subject framed from top to bottom
- Shoot
2nd Picture: Top Side
- LC-A+ in normal position and Splitzer with the bottom side covered.
- Subject framed from bottom to top
- Shoot
3rd Picture: Top Side
- LC-A+ in normal position and Splitzer with the bottom side covered.
- Subject framed from bottom to top
- Shoot
- MX Button
3rd Picture: Bottom Side
- LC-A+ upside-down position and Splitzer with the top side covered
- Subject framed from top to bottom
- Shoot


Both Sides Exposed
It even harder to get symmetrical results for pictures with both sides exposed. My guide for the first try was an Advanced Tipster by Lomographer hodachrome. Flipping the film, it’s not easy, since you have to do it in the dark. I’ve made a single “upgrade” to Hodachrome's method.
How to flip the film:
Materials Needed: Duct Tape, Scissor, and an empty film case.
1st: With the duct tape, join the full film with the empty one. You could do that in the light.
2nd: In complete darkness, rewind the film from the full case to the empty one. Once you reach the end you can turn on the lights.
3rd: With the scissor cut the film leaving 1cm to join the films again. In this case, you are cutting the film at the end of it. Flip the case and join both again.
4th: in full dark rewind the film again. Now you will have a Red Scale film ready for symmetrical pictures.

How to take Symmetrical Pictures:
Materials Needed: digital camera, pencil, and notebook.
In order to reduce the mistake factor, since it is easy to lose the count, do the same shot 2 or 3 times.
- In the right side one of the film, with splitzer bottom covered, take 3 times the same picture.
- Take notes about it. In frame reference points, feet position and height of the camera in the time of the shot. To help your memory also do the same picture in the digital camera.
- Flip the film #With the help of the reference notes and the digital picture try to reproduce the pictures again. Since you got 3 identical pictures, most of the time you get one good result.
Note: this technique could produce disappointing results, so a good recommendation is to shoot only half the film with this method and the other half with standard pictures.
Other ideas: shoot the same picture, first from bottom to top and then from top to bottom, or take the same picture with different kinds of film emulsions to create a colorful series!


10 Golden Hints of Splitzer Photos With LC-A+
- Try, Try, Try and Try again, you will get there.
- Most of the time you will fail
- After lot of practice sometimes you will still rotate the knob and forget the Mx button…you will get a nice half-frame photo.
- Use the Splitzer and LC-A+Different in different positions and directions
- If you get 1 good picture from a 36 roll, is a very good result, if you get 2 is Excellent
- Did you forget to adjust the focus? No problem it is common, the result will surprise you!
- Sometimes when you think you did a mistake, you will get the best photo of all.
- Use all kind of films, the ones from Lomography are the best!
- Film Cross Process is mandatory, even a standard picture will have a fantastic look.
- If you don’t have a Splitzer…Black Duc tape will do the job.


Follow Bruno Ricardo Silva in his LomoHome and Instagram
written by melissaperitore on 2021-04-23 #gear #tutorials


3 Comments